http://food52.com/blog/7317-how-to-make-cold-brewed-coffee
http://www.americastestkitchenfeed.com/do-it-yourself/2011/08/how-to-make-cold-brew-coffee/
http://www.instructables.com/id/DIY-Cold-Brew-Coffee/
================================

How to Make Cold-Brewed Coffee
Inspired by conversations on the Food52 Hotline, we're sharing tips and tricks that make navigating of our kitchens easier and more fun.
Today: What's the big fuss about cold brew? Let us explain.
Iced coffee in the summer -- it's a given. It's cold, it's refreshing, and for many of us, it is a necessity. But what's the big fuss over cold-brewed coffee?
There are a few things about a cold-brew that have made it into the summer beverage du jour. The first thing most people note about cold-brewed coffee is the lower acidity level. Since the grounds never come into contact with the intense heat of boiling water, the flavor profile of the final brew is different than with drip coffee. Similarly, when hot coffee is rapidly cooled, it creates a slightly bitter taste. One of the major draws of a cold-brewed cup of iced coffee is that it will have a smoother, slightly sweeter flavor.

Finally, a cold brew is pretty much ideal for iced coffee because it is more concentrated than a traditional, hot-brewed cup o' joe; the addition of ice and cold milk or cream will dilute it just enough without watering it down.
Iced coffee is more expensive than hot coffee, and cold brew is even pricier. Yet many people are willing to pay extra because they are intimidated by making it at home.
You're in luck; with only three steps, cold-brewing might be the easiest coffee method out there.

Grind, Soak, Wait
The ratio of coffee grounds to water is pretty debatable; personal tastes will dictate your own. A good place to start is 1/3 cup of ground coffee to 1 1/2 cups of water. After you find the ratio that you like best, you can adjust the size to fit as large a brewing vessel as you want. The type of grind, however, has been universally decided upon: it must be coarsely ground. A smaller grind will result in a cloudier liquid.
Put the coffee in your brewing container and add the water.

Stir to make sure all the grounds have been moistened, then cover and place on the counter or in the fridge over night, for at least 12 hours.
In the morning, strain twice through cheesecloth or a fine-mesh sieve.

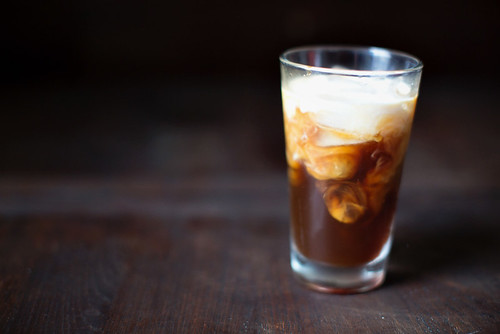
Add ice, milk, or your other favorite coffee companions and enjoy.
*Also, to make a simple process even simpler, this can all be done right in a french press: Add the coffee and water and put the lid on but do not plunge. In the morning, press, pour, and drink -- easy enough to do without caffeine.

Photos by James Ransom
======================

How To Make Cold-Brew Coffee
Caffeine nerds can rest (or wake) easy with a foolproof method for incredible iced coffee.

As a young student of the culinary arts, there were a handful of “commandments”—central tenets of good cooking—that each of my mentors persistently reinforced (read: screamed). One such precept, which has been indelibly seared into my cortex, is that heat equals flavor. Heat browns meat, caramelizes sugar, and extracts body-giving gelatin from bones. Heat also creates aroma, concentrates flavor compounds, and melts unctuous fats. If heat is so great (which it is), why on Earth am I promoting the practice of combining ground coffee with room-temperature water and letting it infuse slowly for hours? The answer lies in the fact that heat is indiscriminate.
It’s true that coffee brewed at 210 degrees will contain more aroma compounds, dissolved solids, and flavor than coffee brewed at 72 degrees. But this is one case where more isn’t necessarily better. Along with the good stuff, heat also extracts the majority of bitterness and astringency found in hot-brewed coffee. Exposed to far less heat, cold-brew is significantly less acerbic than its sweltering sibling. Less bitterness means that the subtler flavors found in coffee beans are more perceptible. For me, good cold-brew balances hints of dark chocolate, caramel, ripe black fruits, and vanilla with a pleasant viscosity, mild acidity, and pitch perfect bitterness. If my description sounds florid to you, it’s probably because you didn’t have cold-brew this morning. In all honesty, it’s lush, nuanced, and incredibly smooth.
Still, cold-brew does have its critics (myself at one time included). Naysayers complain that cold-brew lacks the body and complexity of flavor of a heat-extracted brew. Over the years I’ve tried to extract more richness and complexity from cold-brew coffee, in the hope of achieving the best of both worlds. I’ve tried a number of out-there techniques including an initial hot water bloom (there’s that heat again); pressurized brewing in a cream whipping canister; near-continuous agitation; and five-day-long extractions in the fridge. But none of these techniques improved my cup of cold-brew. What they did was turn a simple, satisfying process into a chore.
After reconciling my love of cold-brew with years of heat-focused culinary indoctrination I am now ready to pass along my own commandments on how to make good cold-brew coffee. I promise not to yell.
STEP #1 ROAST IT

I use medium roast beans (left), which have been heated to a lower temperature than dark roast beans (right). Medium roast tastes more like coffee beans and less like the roasting process.
STEP #2 GRIND IT

I grind my beans fine. Most cold-brew recipes call for medium-coarse or coarse ground beans, but that’s a mistake. The factors with the biggest impact on coffee extraction are water temperature, grind size, extraction time, and finally, agitation—in that order. Since I use room-temperature water I can scratch temperature off the list of variables and grind size becomes most important. Finer particles will release more flavor compounds than larger ones.
STEP #3 POUR IT

I combine room-temperature water (usually filtered, as my tap water doesn’t taste great) and freshly ground coffee in a large French press. The press makes it’s a snap to separate the concentrate from the grinds after brewing.
STEP #4 STIR IT

After about 10 minutes, a solid raft of coffee grinds will form on the surface. I find it important to stir this raft into the water to maximize contact with the ground coffee.
STEP #5

After the initial stir to combine the ingredients, this is the only other time I stir during brewing. As I mentioned before, agitation is last on the list of factors affecting extraction. I find it a nuisance to stir a batch of cold-brew multiple times over the course of a day; the good news is I don’t have to.
STEP #6 COVER IT

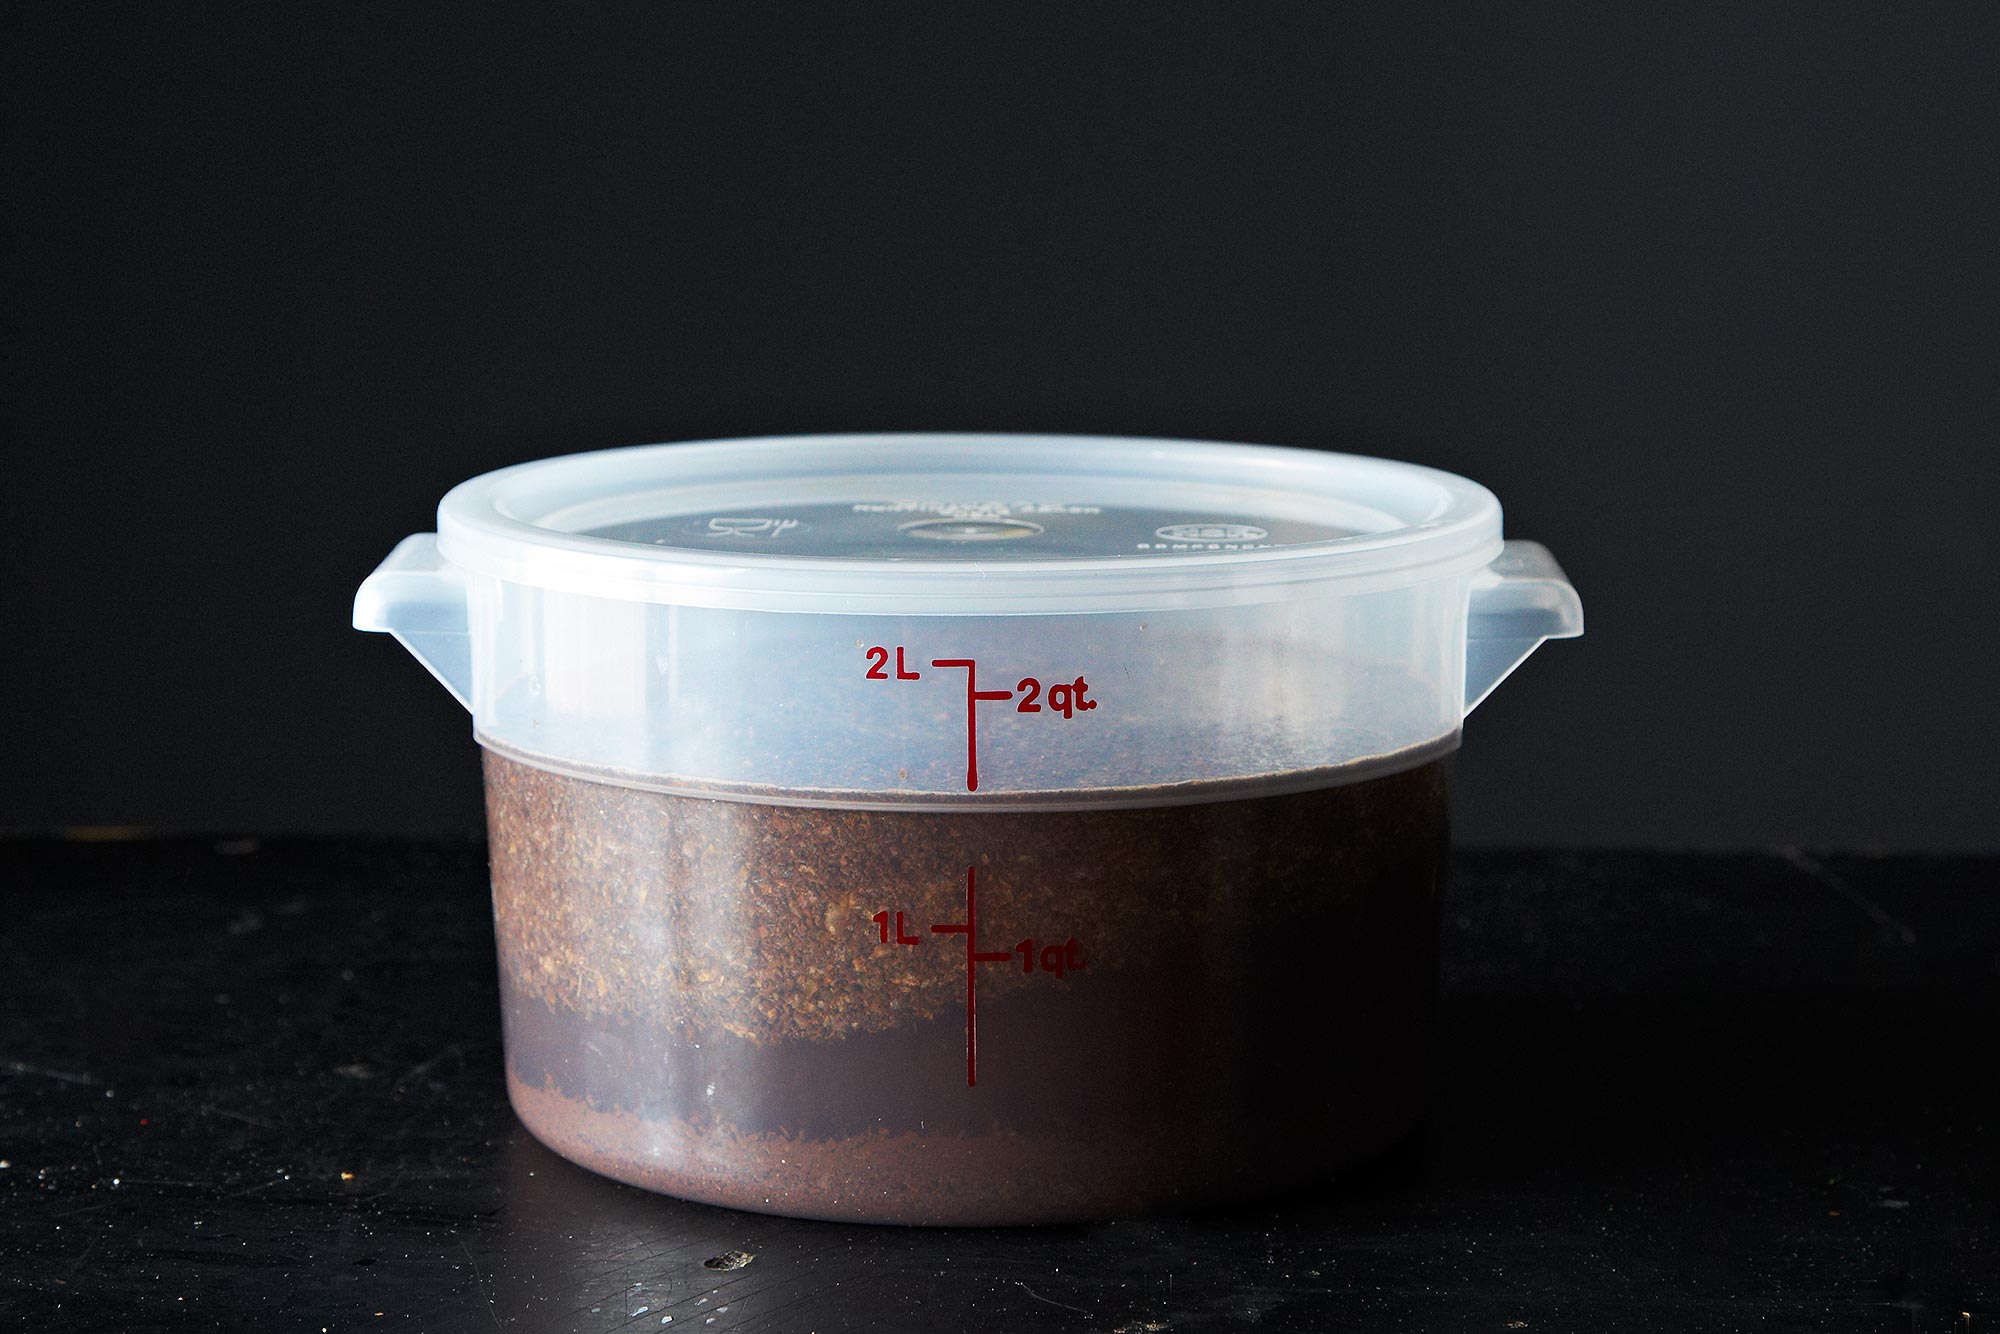
Next, I cover the French press with plastic wrap and let it sit at room temperature for 24 hours (give or take an hour in either direction). I’ve done room-temperature brews as short as 12 hours and as long as 72 hours. Twenty-four hours is consistently the sweet spot.
STEP #7 PRESS IT

After 24 hours, I remove the plastic wrap and press the grinds to separate the concentrate.
STEP #8 FILTER IT

Then I pour the concentrate into a coffee filter-lined fine-mesh strainer set over a large measuring cup or pitcher. Some would say that this filtering step is optional, but I don’t like silt and grit in my cup. Most of the concentrate will filter through unaided, but I find it helpful to gently clear the sediment with a rubber spatula to let the last few drops through.
STEP #9 DILUTE IT

Finally, I dilute the concentrate one-to-one with cold water and pour it into a glass with plenty of ice.
STEP #10 SALT IT

Now, instead of reaching for the sugar (which is unnecessary with super-smooth cold-brew) I stir in a pinch of Kosher salt. Just trust me on this one.
About the Author: Dan Souza
Dan Souza is a senior editor of Cook’s Illustrated and an on-screen test cook for America’s Test Kitchen. In addition to his work on Cook’s Illustrated, Dan has contributed content to a dozen America’s Test Kitchen cookbooks, most recently executing and editing the test kitchen experiments for The Science of Good Cooking (October 2012). Dan cut his culinary teeth as an apprentice in Hungary before graduating first in his class from the Culinary Institute of America (CIA). After cooking in restaurants in New York City and Boston, however, he found his true calling: applying good science to create great recipes for the home cook. Follow him at @testcook.


Step 1: Materials

Supplies:
-6oz of a well roasted coffee
-one piece of felt (.29 cents at michaels)
-two large coffee filters
-a two-liter bottle
-thread
-scissors
-6oz of a well roasted coffee
-one piece of felt (.29 cents at michaels)
-two large coffee filters
-a two-liter bottle
-thread
-scissors
Step 2: Begin

Cut the bottom off of the two-liter bottle.
Step 3: Stand

Use a broad glass to act as a stand for the brewer.
Step 4: Filter

Fold a piece of felt
Step 5: Filter insertion

Roll up the felt and stuff it into the opening of the brewer.
Step 6: Weigh

Weigh out 6 ounces of a good, quality coffee. Bad coffee will only get you bad cold brew.
Step 7: Grind

Grind to the coarsest possible setting.
Step 8: Make coffee "tea bags"

Split the coffee into two large coffee filters.
Step 9: Tie

Tie them off with thread.
Step 10: Set in your brewer

Set them in your brewer, fill with a little over 6 cups of good, clean water
Step 11: Brew!

Brew for 12-24 hours, this batch brewed for 14 hours.
Step 12: Take off the cap!

Take off the cap and a slow drip should start.
Step 13: ALMOST THERE!

So so close
============================